Wednesday, November 8, 2017

The Greenhouse - Part 1

Next steps... We had a brief cold snap a couple of weeks ago. We had overnight temps in the mid-30s which put the greenhouse project on the fast track. Of course overnight temps are back in the high-50s to low-60s, which means the daytime temps, for doing the build of the greenhouse are in the low to mid 80s. That may sound nice to our more northern friends, but trust me, it feels hot, especially in the more direct sun.

Refreshing your memory from the last blog post. We started out with this:

Before
And we left you with this:

In Between
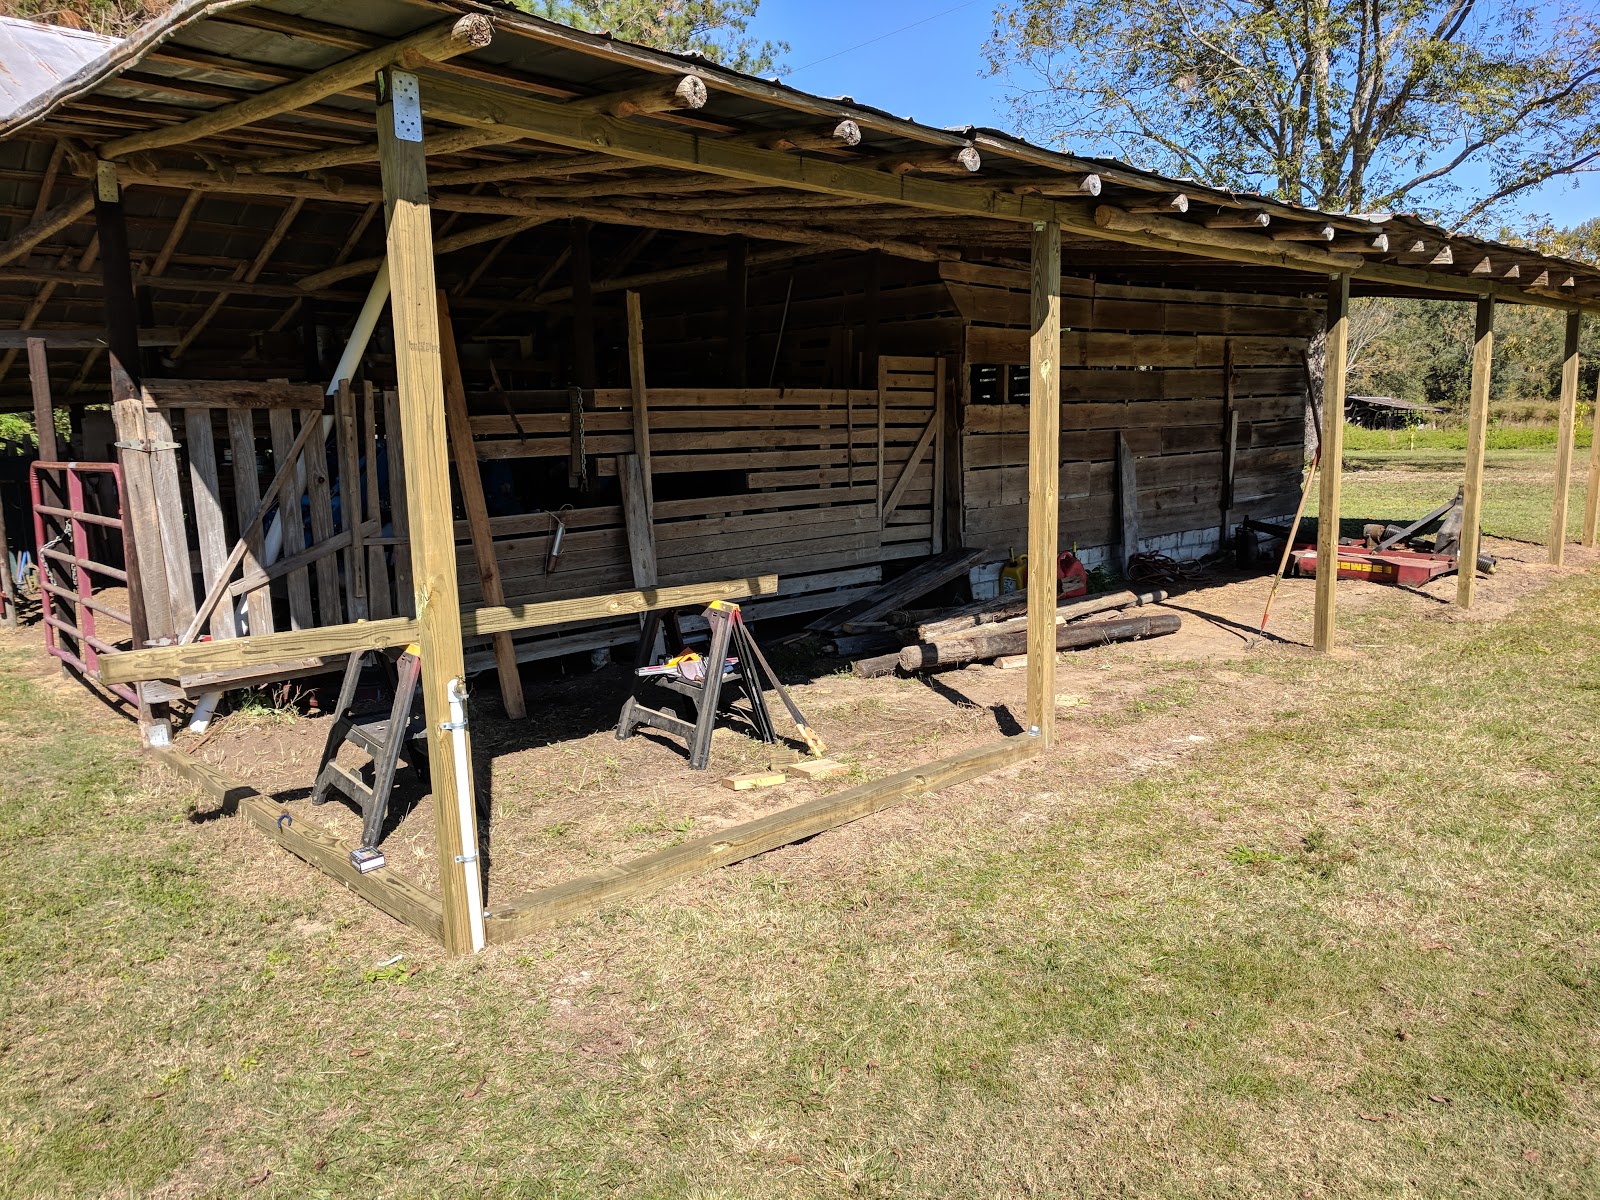
The first steps were laying the "foundation" which consisted of leveling 4x4 beams along the bottom and securing them to the posts on the two exposed sides. Each span was approximately 10 feet.

Leveling up the "foundation"
Once the beams were in place, it was time to start building the upright structure. I wanted to create the first level to approximately "counter height" (around 36 inches) so I'll be able to build my interior shelf for plants to that level. It will also provide the base to my window frames. All framing was also going to be built on 24 inch centers (24 inches between the center of each stud or upright support). Houses are typically built on 16 inch centers, but, a) this is only a greenhouse, and; b) I'm not supporting a lot of weight or a second floor.

The first section (lower structure)
Second section
All lowers complete
Once the lower, counter height structure was finished, it was time to build out the next level and frame out my windows. We removed as many windows (10) as we could salvage from the original farmhouse and this was the perfect project for them. After measuring the windows we determined we had enough room for 3 in each exposed section and one for the door end. We also decided to hinge them at the top. We're still figuring out what we're going to use to hold them open. We'll probably use a metal hook to hold them closed against the weather stripping we intend to use to help keep the cold air out.


First set installed
All windows framed and some upper structure in place
Once all of the window frames were built and the upper structure was in place on one full side, I decided to jump to installing the clear plastic panels along the east wall of the greenhouse. I was eager to see how it would look from an aesthetic perspective.

First two panels
Installing the panels was pretty simple as I made sure all of my measurements were on and my upright structure was plumb. I used a utility knife to cut out around the windows.

One side complete
Interior view
Getting the first side done was a mostly all day job, though that day also included caulking all of the loose panes in the old windows and finishing installing the last 3 windows on that side. The next day I finished the upper framing of the south end. Today I finished the panels on that end as well.

Two sides complete* (*still have to cover gaps at the very top, between and up to the rafters)
Interior view

I'm at the halfway point, so to speak. I still have two walls to go. The north end (closest to you in the above picture) will have a door (French door, also salvaged from the old house) and a single window. The other side (right side of picture above) will be covered with plastic panels as well. I plan to remove every other plank that you see on that wall and move them up to create larger openings. This will give me structure to attach my plastic panels, and also allow more light into the area where I keep my mower, tractor and other equipment.

The remaining work also includes: scraping/raking the area smooth, putting down heavy weed-stop cloth and bringing in a load of gravel about 3 inches deep for the floor (we'll also do the same for the tractor/mower area), filling any panel gaps with spray foam, weather-stripping the windows...oh yeah...and getting electricity run to the barn so we can heat the place this winter.  I envision it looking like this:

A guy can dream, can't he?

Depending on how well the remaining work goes will determine whether we replace the roof with heavier duty clear plastic panels this year, or wait until later. This is plenty of light inside the "greenhouse" for now, so we're pretty sure any tender plants we put in there will get plenty of sun.

I hope to have the place built and sealed up (reasonably) tight in the next couple of weeks so I can write about Part 2. We'll keep you posted.

Wednesday, October 25, 2017

Checking off another project - mostly

For those of you waiting with bated breath for another blog entry, sorry, you've already passed out, gasped and revived and then repeated this process over and over for days, weeks and months. Well...wait no longer and breathe easy.  We're back!!!

The biggest reason we haven't updated you about things is, well okay, the many reasons are, we had a disappointing output from the garden (too much rain, weeds, etc. so we didn't want to blog about that), we have been very busy and when we haven't been busy we've just plain been lazy or have forgotten. There...we've admitted it.  But now we have progress to report.  Back in January one of the to-do items on our list for this year was to clean out the little barn and add a greenhouse on the back.  The barn is fairly clean so the addition of the greenhouse has begun.

Before
Let us set some expectations for you.  First, there is still no "greenhouse"...yet, but we're  starting on it.  Phase One involved raising the roof (this joke never gets old). Actually the side roof over the open side of the barn.


The span that needed to be raised was around 42 feet long. Some of the wood joists are rotten in places. This was going to require very fragile handling. After sitting down and going over a lot of algebraic equations, some geometry, in-depth engineering, architectural drawings and just plain old gut instinct I figured out how to do this very delicately.  Just lift that baby with my trusty tractor bucket like a boss.

Nothing a little brute force can't handle.
With boards and metal creaking and groaning, I lifted a corner of the roof. To my surprise, the posts lifted out of their holes and very little was bent out of place. This looked like it was going to be easy.

Another benefit of the tractor is ensuring that the structure isn't going to collapse on your head while working.

First span in place.
As mentioned, the entire length of the roof to be raised was around 42 feet. So my plan was to do 2 - 10' sections first, then 3 - 8' sections to finish off (that's 44', I know. More on that later). The larger sections will comprise the greenhouse portion of the barn, the other sections are wide enough for me to back the tractor in and drop my implements such as my tiller or bush hog (more on that later too).

The second 10' span is in place.

As most of the holes I needed were already there from previous posts which ended up being in about the same places I needed them, I didn't use the post-hole digger on the tractor and opted for digging them with a shovel. Luckily I was pretty close to the right depth with each hole I dug as well, only having to make small adjustments to get my top pieces level.

The third span! Two left to go!
Oops!  Sometimes the wood on the rafters didn't hold up to the lifting.

As I went along from span to span I was worried that the metal sheets on the roof would separate, but other than a small spot at the edge between the first two spans, everything stayed intact. The last two spans were the easiest of all and only required one lift with the tractor.

I just looks so much cleaner and open. Once I put windows
in that side of the barn it will be a lot brighter inside.

So about having 44' of boards for a 42' span.  I'll just cut that off.  Or maybe Neta will want to use it to hang something on, like a hanging basket. Who knows?

Remember that I mentioned backing the tractor under to keep my implements there? I'd already been doing that, but could only go so far because the roll bar on the tractor hit the edge of the roof. So by raising the roof higher and having 8' of clearance under that support beam solves that issue, right?  Not exactly.

The barn isn't built on even ground. The left side (south end) where the greenhouse is going to go has 96 - 98 inches of clearance, the tractor roll bar is at 95 inches. Keep in mind that my support beams are level. However, the further to the right (north) you go the higher the ground gets. At the far right side I've only got about 84 inches of clearance.I can back into the middle spot, but not the next one. DOH!!!  I might have to do some digging and leveling. We'll see.

The finished product...as new posts and supports go. On to framing out the greenhouse!
That's all for now. We'll update you as we begin to build out the greenhouse.

Wednesday, June 14, 2017

Catching Up

It's been a month since our last entry and, frankly, we didn't realize it had been that long. Life has been busy around here with all of the gardening we've been doing, plus other stuff.  The bigger the garden, the more work it is to keep it weeded, keep things picked and keep Mother Nature and her minions from ruining your work.

The garden has been producing for over a month now.  We had our share of radishes as we mentioned in the last entry.  Now the zucchini, squash, cucumbers and bush beans have come on in full force.

We have two trellises of cucumbers. Giving them something to climb
allows them to grow nice, straight cukes.

These will need one more day.  We try to pick them when they are about 5-6 inches long.

We also have peas, which we planted a little late, so they're not thriving in this heat, but we have a few in the fridge and a few left on the vine, with some pole beans next to them.

Peas to the world!!!
The pole beans with a few weeds in front and the cukes providing the backdrop.

Zucchini (right) and squash (left) with a volunteer sunflower
and some zinnias mixed in for good measure.

This is what happens if you forget to pick your zucchini for a couple of days.

Boat paddle? Fence post? Radioactive seeds?

I haven't made it past the cukes, zucchini and squash yet!
The rest of the garden is growing.  Great in some places, slowly in others.  Our tomatoes have been slow to grow, despite plenty of rain and sunshine.  We do have a few green ones on the vine, but no ripe ones yet.

The cages of tomatoes.  Approximately 50 plants in all.

Soon...we hope!

Indigo Rose

We also have okra, both planted and volunteers from last year.

Volunteers.  We love it when there's less work involved.

Red okra already showing some tiny pods.

Our sunflowers are no slouches.  Neta planted a row of various seeds, but only a few came up, though they are some nice ones.

The big one in front is a "Skyscraper" with the potential to grow up to 12 feet.

It's well over 7 feet at the moment.

With the lack of sunflowers from the first planting, Neta grew more sunflowers in seed trays and transplanted them into rows later.  So far everything is doing well.


Last but not least in the garden is our corn and melons.  The geese had a field day with the original corn we planted and after they had their way with it, we could only salvage about 8 stalks, which we ended up transplanting.

The transplants. They're surviving.

New corn.  It's kinda hard to see, but trust me, there are several rows there.
There is a canary melon in the foreground.
We have two kinds of cantaloupes and a canary melon (seeds from one we ate).  They started out slow, but have begun to take off lately and every plant has at least one melon showing.


Kinda furry.  I hope he outgrows it.

Going back to the transplanted corn for a moment, we finally broke down and realized that between the geese and the deer, we needed to do something about protecting our garden.  There is plenty of fencing available on the farm, along with some we brought along for Sammie when we moved down. Using the dog fence, we closed in about 2/3 of the big garden.  That keeps the geese out.  The deer can still jump it as it's only about 4 feet tall, but we hope it's enough of a pain that they'll move on to easier pickings.  So far they have.  We also have a 24 hour "sentinel" on guard...this guy:

The Scarecrow!
The Scarecrow is a motion-detecting sprinkler that we've had for a few years.  We used it to keep the herons and raccoons out of our fish pond when we lived in Vienna.  It can't cover the whole garden, but it will hopefully keep the deer off the sunflowers.  We've been lucky so far.

So here was today's bounty after I finished picking the bush beans.  Keep in mind that we also have beans and peas in the fridge from previous pickings. Neta has been taking produce into work and giving it away as we can't keep up with production.  There's been too much going on to preserve things for now.  But soon...

Aside from the giant zucchini, everything else is pretty normal.
In other news our swallows have laid eggs (4) and the chicks have hatched.


The one at the front right was giving me the "stink eye".
They provide plenty of entertainment as the adults swoop in and out feeding the chicks, their hungry mouths agape waiting for a delicious meal of bugs.

Finally, in home improvement news, we got a couple of chairs and one of our gliders sand-blasted and painted.  I got a recommendation about a man in Statesboro (Statesboro Powdercoating) who refinishes just about anything you want.  I took them to him and he worked his magic...and then some.

The other glider hasn't been painted yet, but here is a picture of it as an example of the "before" state of them both.

Not bad for a 4 or 5 year old spray paint finish.
But here is the new, improved finish on the other glider (and chairs):

It looks almost brand new!
A closer view of the finish.
It's like a peel and facelift!
That's about all for now.  I hope we can be more regular than once a month, but know that we are always busy and working to improve things around here with gardens and other stuff.  We hope our next post will have news or ripe tomatoes.  We'll see...