Sunday, June 14, 2020

Pulling the Old Switcheroo (and other stuff)

On Monday we'll have had our guineas for a year, picking up 18 of them as week-old keets. We've certainly enjoyed them, but some of the local wildlife (namely coyotes and possibly foxes) has not been kind. Our numbers have recently dwindled to 7. Not good.

Guineas are not fully domesticated so trying to keep them penned up will not work. They need to roam. Now that warmer temps are upon us the guineas are in the mood for love and that love leads to laying eggs and laying eggs leads to getting broody and wanting to sit on a nest...usually hidden in the weeds/woods somewhere...once there are about 30+ communally-laid eggs in that nest.

Guinea nest in the edge of the woods
A nest that is about halfway full


We've managed to find most of the nests and have tried to protect them, but even so, the Mama guinea leaves the nest early in the morning to eat and that seems to be when they are killed. I have no idea how they have survived in the wilds of Africa. So from the newest nest we began to take the most recent eggs and put them in here:

Our new incubator
IncubaTRON 5000XL Gold Extreme (not really)
 
We figure if we're going to lose them to predators, we might as well try to replace them, if we can. We just started the incubator a few days ago, and then...

One of our chickens went broody on us. She's smart enough to stay in the coop on her eggs in the nesting box, safe and sound. But the joke's on her as our rooster has been dead and gone for two months, so she's trying to hatch duds. This means, we have a second incubator for our guinea eggs. We just have to convince her to sit on them.

Our broody hen
That looks says "Don't start nothin', won't be nothin'!"

I've seen videos and read blogs about dealing with a broody hen. She will guard her eggs and isn't happy to have someone messing with her while she's trying to raise a family. She'll peck, snarl, make strange noises and do all within her power to keep you away. I'm sure if she had a grenade or rocket launcher, she'd use it. Keeping this in mind, I'm sure she didn't want me reaching in and switching her eggs for some new guinea eggs. But we had to try, right?

We gathered the three newest (today) eggs on the guinea nest and headed to the coop. Our plan was for me to reach in and grab the hen, wearing work gloves of course, while Neta removed the old chicken eggs and replaces them with the guinea eggs. Sounds easy enough.

Believe it or not, it was. She pecked me once (on the glove), but was very docile other than making an otherworldly noise when I picked her up that may have been summoning some ancient chicken demon or putting some fowl curse on me. Neta swapped out the eggs and I put her back in the nesting box. She (the chicken, not Neta) re-arranged the eggs a bit, then settled down on top of them just like nothing had changed. Now, we hope she can be patient enough to sit on them for 28 days, since chicken eggs only take about 21 days. Fingers crossed.

In Other News...

On the fruit and veggie front our garden and fruit trees have been doing quite well. We got our first peaches a few weeks back. Our trees are still small. The later one has 4 peaches on it but they aren't ripe yet. The early one also had 4 edible peaches which we turned into peach milkshakes two nights in a row. YUM!!!

Our La Feliciana Peach
Our La Feliciana Peach (the later one). Hopefully they'll get bigger
and be ripe in a few more weeks.


Our apple tree (an Anna apple we think) has about 10 or so fruit on it. One ripened early and we enjoyed it a couple of nights ago. That was a highlight as apples don't do well in the south with so much heat. This apple was firm with smooth white flesh and just slightly tart. We're looking forward to more of this.

Our Anna apple
It wasn't this apple. We ate it before thinking to take a picture.
 
Our blueberries are peaking right now. They'll keep going until the first week or so of July.

Pure Goodness!

Neta has used them with some of the wild blackberries she's picked to make "Black & Blue Jam". Quite tasty. But they're hard to beat directly off the bush.

We'll finish up with a tour around the vegetable garden. This year Neta has nearly perfected things. The garden is nearly weed-free through her use of cardboard and weed-stop cloth in-between the rows, and lots of mulch and pine straw around the plants coupled with an array of soaker hoses to help keep things watered. Here's what we have going:

Asparagus - This is its 2nd year. Not quite ready for harvesting. It will be established enough next year. It's still putting all of its effort into growing and expanding its root system.

Asparagus
Asparagus, fronted by painted gourds on thick branches (ask Neta)


Leeks - We harvested them a couple of months ago. We're letting a few go to seed to replant for next year. The pollinators love the blooms.


Leeks

Tomatillos - They've struggled a bit this year. Could be too much recent rain. We'll keep you posted on them.


Tomatillos

Peanuts - Jimmy Carter isn't the only peanut farmer in Georgia. We grew a few last year. Just enough to make us want to try it again.


Peanuts

Sunflowers - We grow them every year. So far we've only had one of the smaller ones bloom, but we have plenty of others that are still growing. We have to plant them in the garden to keep the deer away. They love to eat sunflower leaves and the tender young stalks.


Sunflower

Okra - You pretty much can't fail with okra. It will grow anywhere and will get very prolific. I'm sure this year will be no exception.


Okra
Okra


Cow Peas - Southern Brown Sugar, to be exact.  Our first year growing them, they are just about to start blooming.


Yard-Long Red Beans - Red Noodle, appropriately enough.  We grew a green variety last year and really enjoyed it.  This year we had an aphid problem early on but a few applications of Neem oil cleared that up and now they are coming on strong.


Corn - Silver Queen, growing up among our watermelons.  


Red & Yellow Bell Peppers - we're picking a few while still green.  


Eggplant - Many varieties, shapes and sizes. Black Beauty, Casper, Ichiban and many others. Eggplant is one of our favorites and we use it in many dishes. We especially enjoy grilling them and pureeing them down into a smoky Baba Ganoush or taking the skinny Italian or Japanese varieties, thinly slicing them and frying them into chips to just eat plain or adding them to Sabich, an Israeli vegetable sandwich. Delicious!


Tomatoes - we're just at the start of what will be a bumper crop, but unfortunately the first harvest is likely to be the last for most of these plants due to Fusarium wilt.  Neta fights it every year, some years more successfully than others. This year, the two varieties that have done the best for us are Park's Whopper and Defiant.


That about sums it up for this entry. We are hoping to have a bountiful summer of fresh veggies and fruit. And who knows, we might even have a guinea keet or two running around here in a month or so. We'll see...

Tuesday, May 19, 2020

Who'da Thunk It?

We sort of knew what we'd be getting into when we bought this farm from Neta's family, but there are days where we just look at each other with bewildered looks and realize that "we never saw that one coming".

Sure, we knew that we'd spend lots of time cutting grass, creating gardens (both vegetable and flower), clearing trees and brush, fixing up various structures, building new ones and eventually getting some animals for various purposes, like chickens. What we didn't envision...becoming veterinary surgeons. We did not have doing surgery on chicken feet on our "Farm Chores Bingo Card".

One of our chickens (Annie, as in "Little Orphan" since she's mostly reddish-brown) has been limping around a bit and walking completely flat-footed. A quick check of the internet gave us a list of possible ailments and looking at Annie's feet revealed the most obvious culprit...Bumblefoot.

Chicken with Bumblefoot
Hard, swollen pad with a black scab. Drs. Craig & Neta to the OR...STAT! 

Bumblefoot is basically a staph infection usually in the pad of the foot, but can also show up in other parts of the foot. A hard, infection-filled abscess forms in more advanced stages. It can be caused by a variety of things, but it usually starts with a scrape or cut on the chicken's foot. And considering that they scratch around in dirt and their own poop all day, it's an environment ripe for infection.

Neta and I agreed that she would hold Annie, while I did the surgery. Then I would hold Annie while she dressed the wound.

Step one was putting the Annie's feet into a bath of warm water and Epsom salts for 10 minutes. We had an old cooler that worked out well as the recommendation was to keep the chicken is a darkened place to help her stay calm. Don't worry, we kept the lid barely cracked so she wouldn't suffocate.

Just prior to closing the lid for about 10 minutes.


After the bath we dried her feet, put her headfirst and upside down into a cloth bag (again to keep her calm) and moved on to step two: Removing the abscess.

This is where things get interesting, for us anyway. We did not have the benefit of a sanitized operating room (our back porch) or fancy surgical tools (small sharp scissors and tweezers), but we did have the internet to fall back on. We're not doctors, but with the help of several "chicken blogs", I can say with confidence that Neta and I are now certified country doctors (specializing in poultry podiatry) and we're awaiting a call from the Discovery Channel about getting our own show. I won't go into details about the surgery other than to say it was not as bad or as horrific as we anticipated. Even Annie didn't seem to be very distressed throughout the procedure.

We operated on both feet as the other foot was affected, but much less so. You can see our handy work here. It is not gross or bloody, but we decided not to display it for those that don't like pictures of open wounds, no matter how small and clean they may be. The link will open a new window.

Once the "surgery" was out of the way, Neta handed Annie over to me and she proceeded to bandage her up. She packed the wounds with Neosporin, applied a folded piece of gauze for padding and taped it in place. It was like taping the hands of a very small boxer.


Annie did very well. The two doctors also did very well. We did not pass out, vomit or run screaming for the hills. This wasn't as complex as a quintuple bypass, but it wasn't as simple as splinter removal either.

Once the taping/bandaging was complete, it was time to isolate Annie for a few days while her feet healed. We set up a dog crate in the coop with food, water and some soft bedding.

Annie is not happy being stuck in this cage, despite healing feet.

We changed the dressings on her feet a couple of days later and all were healing nicely. Two more days later we only had to dress one foot as one was completely healed. After a week she was free of her bandages and isolation and is back among the other chickens. We found a small scratch on one toe which we taped. So she's still walking flat-footed on one foot as she's trying to figure out what that thing is on her toe. The other foot is slowly going back to normal as she walks around.

In the meantime we've upped our game and purchased some basic surgical tools for future operations.

Is that instrument in the center right from Disney?


We found another chicken with a milder case a few days after operating on Annie. We've also cleaned that foot up, though it was not abscessed, and bandaged it. We didn't isolate her as it was a very mild case.

So here we are. If you'd asked us what we'd be doing later in life, we would not have said we'd own a farm in Georgia. We certainly wouldn't have imagined doing surgery on chicken feet. Now that it has happened it makes us realize that we probably don't want to take on animals that either our vet won't work on or ones that outweigh us/could kill us. We promise we will not be the next Tiger King or Queen.

This blog entry has gone on long enough. I don't want to sound like a heel, but our sole purpose is to toe the line and keep everyone informed and entertained. We hope we nail it from time to time, but we realize we may not always sweep you off your feet. So we'll try to stay instep and keep writing when we have news to share to remain in good standing. We're sure there will be more stories afoot from your new favorite Chicken Podiatrists!

Thursday, April 9, 2020

Life During (Virus) Wartime

As we're all practicing social distancing, it doesn't mean we can't meet you on the computer or tablet or phone.

I'm always here on the farm during the work day, but Neta usually isn't, so not only am I enjoying her company but we're both getting a lot more done around the farm now that she doesn't have a commute home each day. I'm usually out doing my customary spring chore of cutting grass almost every day as it grows so fast, Neta has been busy using her extra time to prepare the garden beds/rows for seedlings of tomatoes, squash, beans, peppers, cucumbers and many other staples of our garden. She already did some work over the late fall and early winter that has us reaping the cold weather veggies. While we enjoy those, we'll wait for the summer vegetables to start producing.

Radishes, turnips, beets, kale, spinach, collards, mustard, bok choy to name a few.
Pineapple sage in the right foreground and corn under the cloth (crow prevention).

Peas

A couple of rows of various tomatoes and peppers

Some kale that Neta picked. She plans to roll and stuff the leaves. Yum!


Homemade kimchi from some of our bok choy.
Yum for me, not so much for Neta.
Lately I've also managed to squeeze in a few other minor tasks that I've been wanting to do for a while.

- A new temperature controlled exhaust fan for the greenhouse to help pull the hot air out during the day. This is something I've wanted ever since we built the greenhouse, but we always had other jobs/priorities.


- 3 new bluebird houses, because we love bluebirds. We have 2 previous ones along with a purple martin house that the current bluebirds rotate their broods between. We wanted to give them more options and have room to grow the family, as long as we can keep the mockingbirds from killing/driving them off.

If you squint and look way off in the distance you can see the third birdhouse.
A bluebird peeks its head out from one of our original houses.
Some sad news...

We had to say goodbye to our rooster, SideEye Bill. He became too aggressive. He would try to come after me when I'd let the birds out in the morning so I'd resorted to tossing sunflower seeds out so the other birds would create a wall between us. As he and the rest of the chickens began to spend time closer to the house, if Neta or I walked from the house to the barn he would sometimes follow us and chase us if we allowed him to get close enough. Even carrying a stick or rake didn't stop him. He'd attack that too. We finally made the decision that he had to go. Life on the farm isn't always pretty. I'll leave it at that.

RIP SideEye Bill

In other fowl news, our chickens and guineas have been giving us eggs by the truckload. Especially the guineas. We've found several guinea nests around the farm where they've skillfully hidden their clutches. We gather the eggs and usually leave one behind so they'll keep coming back and laying. Occasionally an animal (we figure a possum, raccoon or fox) finds them and enjoys a treat. 


We found these on one of our timber piles
These were at the base of our huge oak tree near our wildflower meadow.

The guinea eggs we gathered have found their way into many dishes so far. They taste the same as a chicken egg, though they are about 2/3 the size. We've had them scrambled and fried for breakfast. Neta has made Deviled Guinea Eggs along with adding them to some fried rice and several other dishes.  We've also given away several dozen (both guineas and chicken) to neighbors and friends who've helped us with things in the past, or because eggs aren't always in stock at the store in our current situation.

We did a little research and found out that the guineas won't sit on a nest until there is a larger number of eggs (usually 20 or more) so we stopped taking them to see what would happen and it worked!  One of our guineas turned broody and she's sitting on a nest that is hidden in the garden next to the house. We hope the proximity to the house, along with it being surrounded by tall grass/flowers and a small fence will help protect her from any predators with nefarious intent. There are 13 eggs in the nest, though only the last two appeared as she started sitting, so we don't think many of them will be viable. We may see some new keets in a month or so if all goes well. Fingers crossed!

Momma is that gray football-sized mound in the middle of the picture.
She's well hidden and hasn't been bothered so far.

A few other updates since we're not going anywhere...

We've got blueberries and peaches on the way. They seemed to blossom early this year (we need to keep better track) and we had some hard frosts once there was fruit on the bushes/trees. Still we seemed to have made it through, though the peaches have less to show for their hardiness. Most froze and died, but the earlier of the two trees still managed 4 peaches. The other tree is smaller and isn't quite as mature, but it has a few fruits to show for its patience.

Three on a single limb. There is also one on another lower limb.

This one blossomed later and avoided the frost.
There are a few we hope make it to maturity.

Plenty of blueberries on the bush. Should be ripe by June.

Lately we've had a menagerie of fowl to supplement our current flock. We didn't get pictures of all of them. Lately we've had a pair of quail making appearances, probably refugees from next door. Yesterday we saw a wild turkey in the meadow, and this morning we had a dozen geese near our front (small) pond along with a bunch of circling swallows (over another field) and later a hawk in the pecan tree out near the front pond. (Swallows and hawk not pictured)

The geese are a little hard to see in the shade.

They've shown up several times over the last week. In the bird run,
at the edge of the woods, on our front porch, etc.

And we'll finish off with a couple of pictures of domestic (animal) bliss.

The pastoral scene of guineas grazing on the front lawn.

Lulu and the chickens enjoying the front porch together.

One final note - Remember:

- Keep your distance from people you're not already living in the house with;

- Wash your hands often;

- Wear your mask in public;

- Keep in touch with friends and family. My group of friends and I use Zoom for video calls. It works within your web browser or on your smartphone. The free (Basic) account allows you unlimited one-on-one video calling;

- And finally, Keep reading our blog. It's been deemed safe and virus free.


Sunday, February 23, 2020

How Much Wood Would a Wood Duck Duck, If a Wood Duck Could Duck Wood

This all started a couple of years ago when a friend of mine, Joe Talbott, was visiting. He looked out at the swampy woods around and beside our "island" and said something along the lines of "This looks like the perfect place for wood ducks."

A seed was planted...

I'd looked online at Amazon and considered buying a wood duck house or two, but recently remembered that I had a bunch of milled cedar boards in our one of our barns that came from the big cedar tree that stood next to the old house..
The cedar tree is to the right of the house. It had a very large trunk and was in the way of construction.

The tree was taken down as we were tearing down the old house and putting up our current one. We asked our contractor to keep as much of the trunk as possible so we could have it milled down into lumber.

Long story short, the pieces we got back from the local sawmill were a hodge-podge of varying widths and thicknesses. Nothing I could really build anything substantial with, like aromatic closet shelving or beautiful cedar furniture. I stacked the wood in the barn and more or less forgot about it...until I wanted a wood duck house.

Prior to the recent New Year I went to MD to visit my mother. My father had an old Dewalt radial arm saw in his workshop that he used for many years on so many different projects. I asked my brother if he wanted/needed/had room for it, he said no, so I brought it back to GA with me.

It's big, heavy and beastly, but it's more flexible than a Russian gymnast and can cut
in any way you can imagine a saw cutting.
I did some research about how to build a wood duck house and came across plans on Audubon.org and the Wood Duck Society. They looked simple enough. It was time to cull through the cedar boards I had, pick out a few and to get to work.

These plans are by Don "The Duckman" Helmeke. He was known for perfecting
the design of wood duck boxes. These plans are the gold standard.

I went about cutting my boards according to the plans.

Everything is cut except the roof.

The cuts involved making a 15 degree cut to follow the slope of the roof for each side. One side had to have a 45 degree beveled edge to allow for a tight closure on the side with the opening (nest box clean-out).

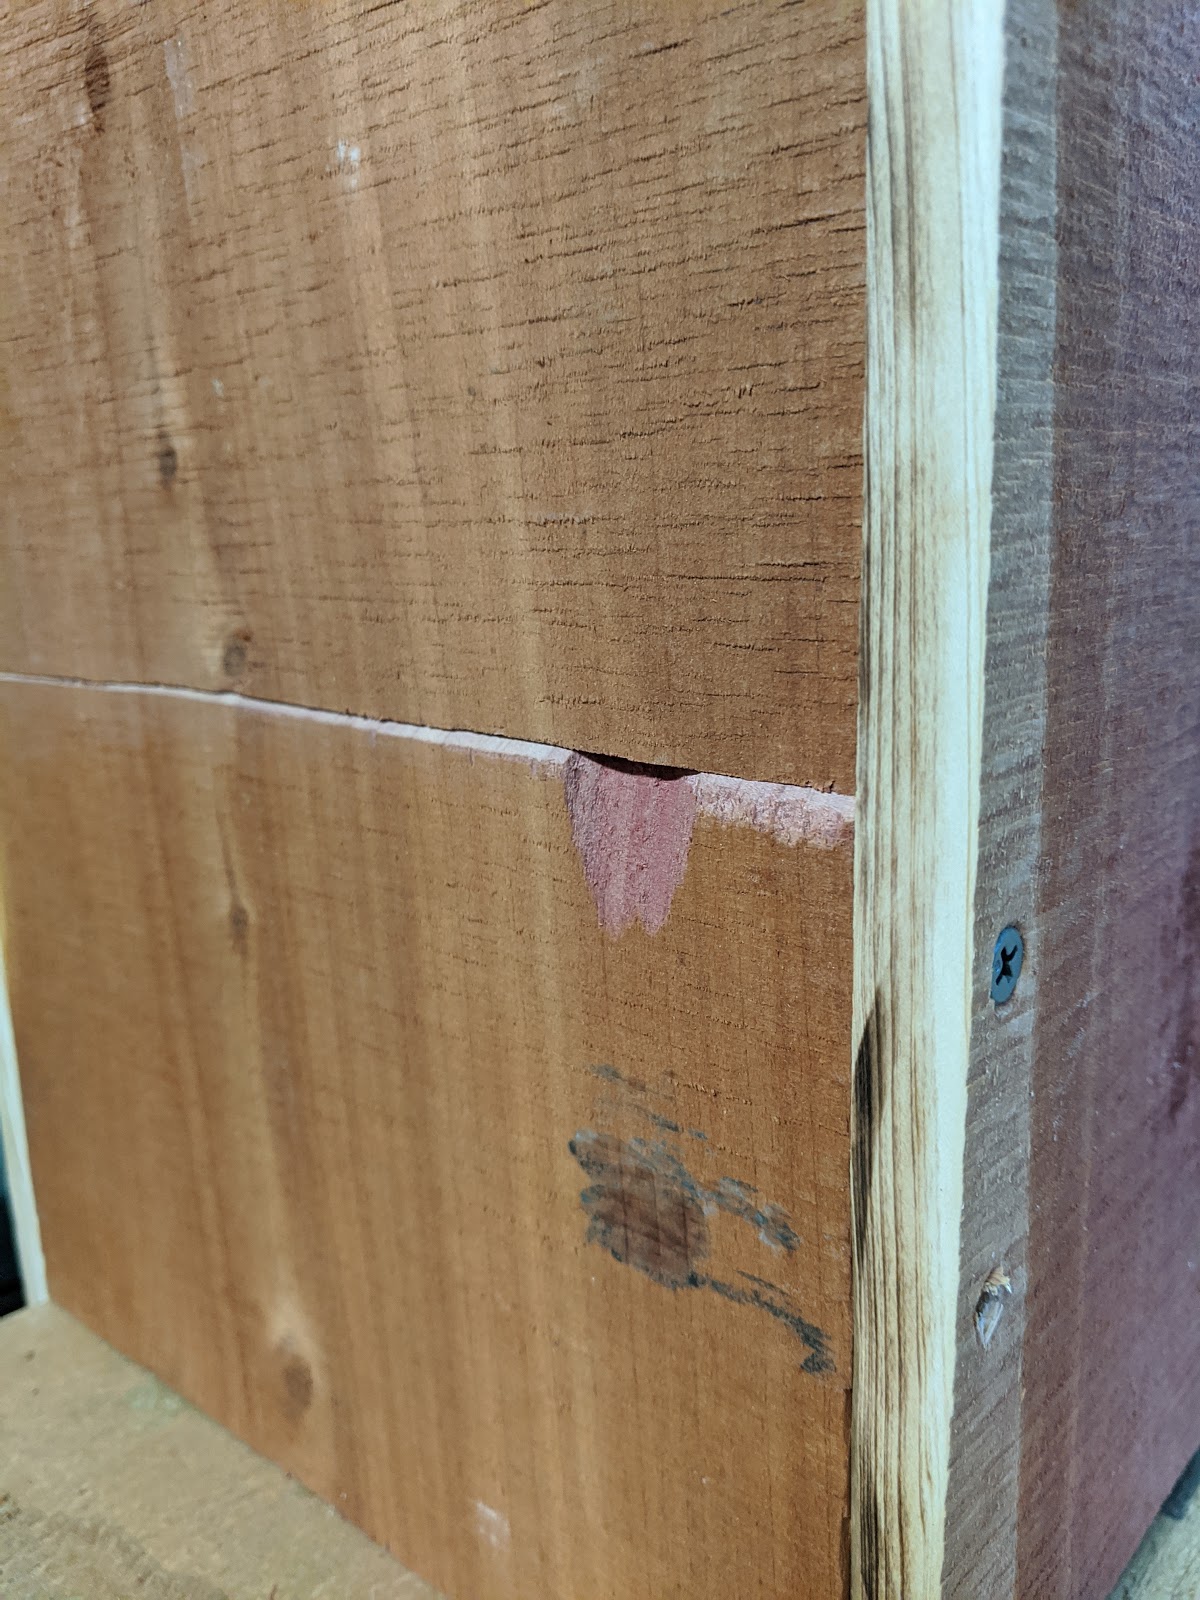
As I mentioned, my boards were all lengths, widths and thicknesses. The thickness wasn't my main concern as this is cedar so it's not going to rot, though the thinner boards will probably warp a bit over time. My problem was having enough boards at the proper width. I needed enough width over certain lengths and didn't always have it. Several of the boards were about about 1/4" less in width than I needed. I figured that that any wood duck looking for a new house wasn't going to break out the tape measure, so if I was off by a 1/4 inch or so, it shouldn't matter. I managed to be close enough on all my boards.

Ignore the water spot. There was a leak in the barn roof directly above my workbench.
The clean-out access with the beveled edge.
A small cutout so you can lift the access door open. The dark scratches below are
from the chuck of the drill. I call that trial and error.
Not the prettiest duck house hole, but it will work. It's supposed to be 4 inches wide
by three inches high. It is...just a little lopsided.

Once I had the main structure put together I had to add the "ladder" for the ducklings. The plans called for 1/4" hardware cloth cut into a 4" x 12" strip and affixed inside, just below the hole. I made sure to trim the ends well to prevent injuries.

Just enough for their little wood duckling claws to grab hold of. Wood ducks have longer claws on
their webbed feet, specifically for climbing trees. 
The last piece of assembly was the roof. The plans called for it to be 11 1/4" x 13". I didn't have a board that wide, in either dimension. So I cut two boards that were 11 1/4" x 6 1/2" and glued/clamped them together overnight. The next day I smoothed out a bead of clear silicone caulk over the seam, inside and out and on the edges, to keep the moisture from softening the wood glue. The only thing left was to put it in place and screw it down.

The fully assembled Wood Duck House.

It's not bad for a first attempt with thin, scrappy boards. I must admit that I really love the color of the cedar boards. I know the wood will last virtually forever, but since it is so thin I hope it doesn't warp too badly in the weather. We'll see.

I had a 4" x 4" post and ordered a predator baffle from Amazon. Mounting it was a bit of a task. Neta and I picked out a spot that was away from where we usually walk around and offered enough cover and privacy for wood ducks to find it appealing. I filled the bottom about 4" deep with wood chips. I used a chainsaw to trim the bottom end of the post into somewhat of a point so I could pound it into the soft ground at the edge of the pond. I added the baffle to the post and carried all of my supplies (over several trips, including a step ladder and sledgehammer) over to the spot we picked out.

Once the post was in place I had a hard time balancing the house in one hand and maneuvering the drill/screw with the other so I could fasten it to the post, all while standing on the edge of the pond and trying to keep my feet dry (dry feet mission NOT accomplished). Some quick thinking had me using a large clamp to hold the house onto the post while I put in the top screw. With that done, I lined it up to make sure it was fairly straight (judging by the picture I may have to adjust) and added another screw to the bottom. DONE!

Getting this picture required wading over my boots around to
the other side of the pond. We've had a lot of rain.
So now that the house is in place it's probably a little late to catch the first brood of the season, but if any ducks decide they want to upgrade their living conditions, we'll be ready for them.

We'll keep you posted about any new tenants. Stay tuned!